Cynthia St. Charles Store

Showing posts with label Deconstructed Screen Printing. Show all posts

Thursday, May 5, 2016

Demolition Series Under Consideration

This series dates back probably 4 years or more.  I was doing a lot of deconstructed screen printing and  was so crazy about it.  It is difficult to work with the fabric to create a final piece, though.  I tried and had some minor success.  This is one that I put together, layered, pinned, and set aside.  It is overprinted with a Thermofax screen that was created using the imagery from the deconstructed prints.  It is plenty big and could be trimmed to 40 x 40.  Trimming it to square would give it better balance.  This is one piece from the UFO box that would actually be improved by cropping.  I would remove from the white side.

Wednesday, May 4, 2016

Deconstructed Dandelions 40 x 40?

Rummaging around in boxes, I found this piece.  It is already partly quilted.  It is deconstructed printing and submersible dye printed fabrics cut in crazy random triangles and collaged.  I block printed some leaves because it said Dandelions to me.  So - I made a leaf block and printed away.  There is not a good defined pattern here.  It does meet the 40" criteria.  I think I could quilt the design in black and make the dandelion and leaf imagery pop.  But I found others in the box of UFO's!  Stay tuned.

Tuesday, July 22, 2014

Straight Stitching on Red Swirls

Another of my ideas is to cover the piece with straight (or almost straight) stitching.  I am not sure what I want to do here, and maybe I won't actually make a decision until the snow starts flying, because it is time to get into the mountains!

Monday, July 21, 2014

Black Swirl on Red?

One of my ideas is to emphasize the swirls by using black thread to add more quilted swirls. 

Thursday, March 28, 2013

Another Deconstructed 12" Composition

This 12" square also has the same 3 deconstructed print fabrics as the one I showed yesterday.  I feel like these are working on some level. 

Wednesday, March 27, 2013

Deconstructed Composition 12"

I am playing around a bit more with several deconstructed print fabrics.  This small 12" square has three different fabrics that I think work together.  This is a good exercise in composition.

Sunday, March 24, 2013

Deconstructed 12" Squares

This is another whole cloth piece.  I am not sure this one needs anything......some stitching, perhaps.  This one is going to wait for further inspiration.

Saturday, March 23, 2013

Deconstructed 12" Squares

 I've decided to work with my deconstructed screen print fabric again - I want to try to develop a series with this fabric, and I am finding it remarkably challenging - because the prints are so strong......  I feel like maybe I can experiment with the 12" square format to troubleshoot.  Using the small size reduces the anxiety over using up my precious one of a kind fabric.  Unlike hand painted or hand dyed, block printed or screen printed fabrics which I could easily reproduce - I feel like the deconstructed screen printed fabric cannot be replicated.  The fact that this fabric is one of a kind makes it difficult to build a series.  I am reluctant to cut it up, but I am going to give it a shot.

I am encouraged by the success of my small piece - Red Planets.  This gives me the confidence to try.

Here are several pieces I have cut into 13" squares - aiming for a finished size of 12" square after quilting and binding.

The top two pieces are whole cloth, but this bottom one has a strip of deconstructed fabric pieced in.

Friday, March 22, 2013

Red Planets is Finished!

I've finished binding "Red Planets".  It measures 14 x 25"
I am very satisfied with this use of the deconstructed screen printed fabric.  The unusual patterning creates striking visual interest, but doesn't overwhelm.  I would like to further explore this approach to using my vast collection of deconstructed screen prints.   I am not sure whether this is successful because of the color - or if the results could be replicated in another color scheme. 

Thursday, March 21, 2013

Finishing the binding for Red Planets

I fiddled around with the binding a bit to get the miter to look right and wrapped the binding around to the back, where it is fused in place.  I stitched in the ditch to anchor it.  This technique would never fly in a quilt show.  I wonder if I will someday regret doing the binding this way?  For now - it seems like a great solution!  Quick and it looks great.  I am happy with this piece and am wondering if this is a direction I can go with the deconstructed screen prints I have.....I really would like to build a series with them, but have been somewhat stymied in all my efforts.  Tomorrow, I will show the finished piece!

Wednesday, March 20, 2013

Binding the Red Planets

 I have decided to do something different for the binding.  I did not have enough long strips of this color to make a proper miter, and I wanted the gray to gradate the same on the binding as on the piece, so I used a strip of binding (with fusible on the back) - but I stitched it in place, folding the miters at the corners and stitching them in place, also.

Monday, March 18, 2013

Red Planets Quilted

 Here is "Red Planets" (decided that's what I want to call it) - the quilting is done, but now it needs to be trimmed and bound.  I think I like this orientation best.  I am pondering possibilities for the binding.  I have so many different ways of doing a binding now......hmmmm  I really want to do the best thing and am taking into account the gray gradually darkens towards the bottom on the left side and the fact that I have used raw silk for part of the background.


Sunday, March 17, 2013

Quilting the Red Circles

 I begin the quilting process with the walking foot.  I stitch all the way across, through the center of all the circles, dividing them into quarters.  Then, I go in with the darning foot to do the free motion - filling in the spaces.
Did I mention the gray is raw silk?  It is possible to see the texture of the weave in this close up image.

Saturday, March 16, 2013

Fusing the Red Circles
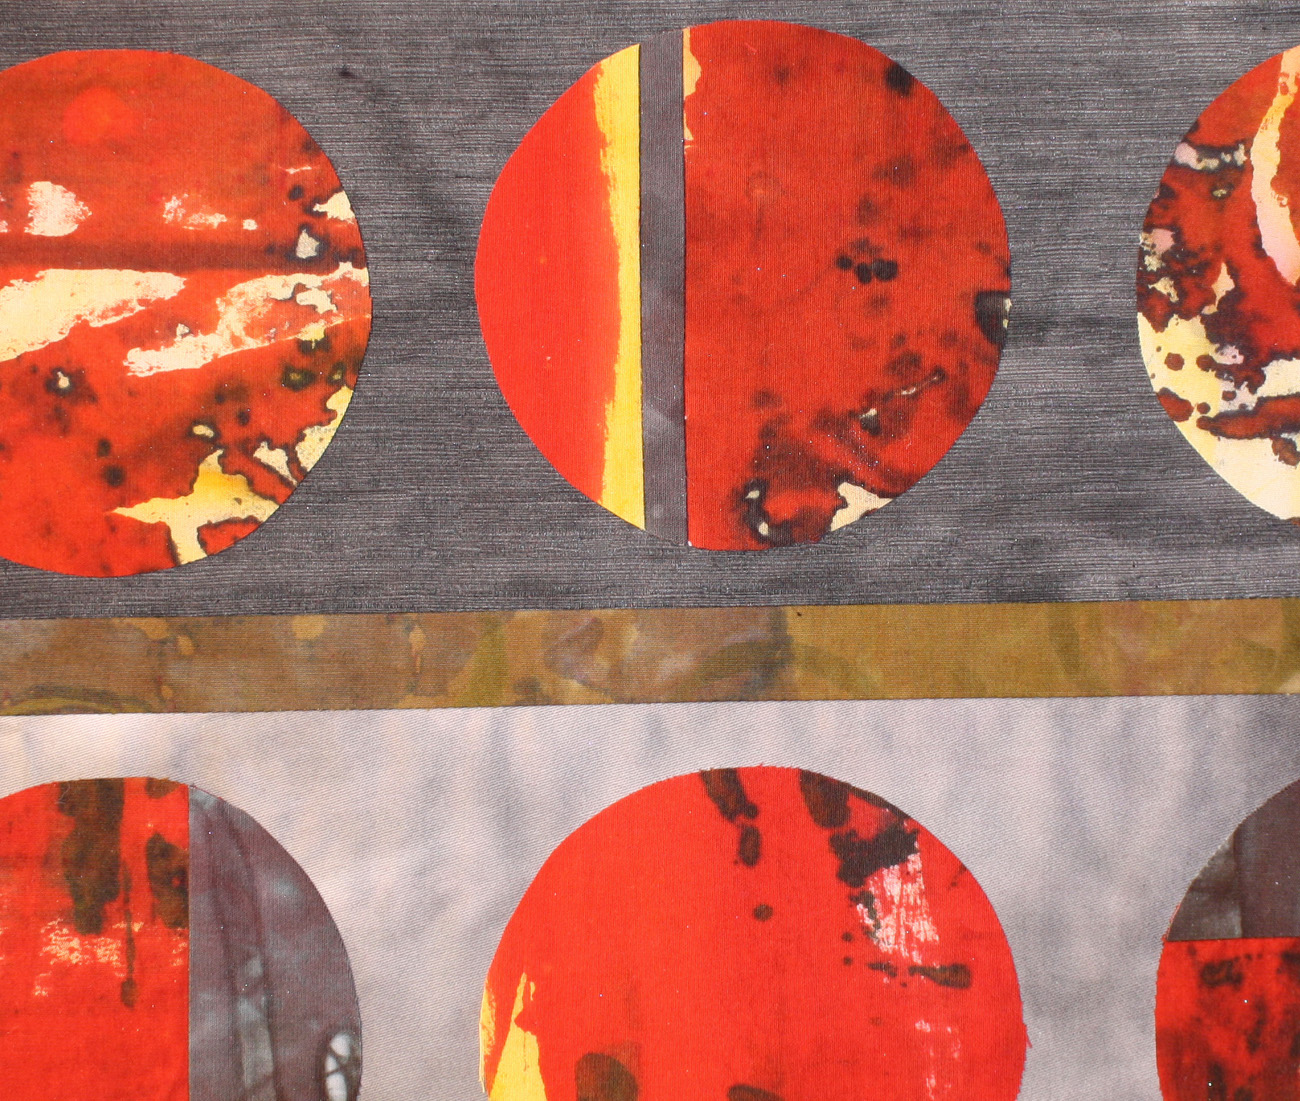
 Here are the circles fused in place. You can see that some of them have other fabrics pieced in with them.  All leftover from some other failed experiment, I think - but this time - I think it works. 

The two bronze strips are pieced.   Next - the quilting.

Friday, March 15, 2013

Abstract Layout with Red Deconstructed

 The red circles were to be fused in place with Mistyfuse, but I was not sure about the layout.  I decided adding a couple of bronze strips (also a deconstructed print that bled and was overpainted).  I pieced one in, but I was not sure about the best placement of the perpendicular one, so here are a couple of options I played around with on the pressing table.

Thursday, March 14, 2013

Red Deconstructed Circles

 I tried to find a picture of the original deconstructed screen printed fabric I started with, but I cannot find one.  I am thinking perhaps I did not take a photo because I was so profoundly disappointed with my results.  This first piece of screen printed fabric I ever did had problems because the red dye bled with the washout and the whole thing was pink.  So I overpainted the whole thing with yellow - which improved it only slightly.  Above, I have an image of a 12" square piece I did using some small scraps of that fabric - just to give you an idea where I started.

I am not sure what made me decide to cut it all up into circles, but I did it one day and then put them aside.  When I unburied them during a studio purge - I auditioned them with some hand painted gray leftover from my Evening Walk series.    I thought this showed promise, so I continued on with it.

Saturday, November 24, 2012

Winter Walk #1

Here is the piece after I have colored in the white areas on the border deconstructed screen print.  I tweeked things a bit before the final fusing.  I realized the border was a little wonky, so I fixed that.  I gave up on the floating blocks and went with just adding fused screen printed cheesecloth and silk organza.  

After I finished this composition and stepped back to look at it - I realized it evoked winter on the open range in Montana.  I have long wanted to do a piece expressing the stark beauty of the winter grasses and bare branches that grace the landscape.  I have always enjoyed the very subtle color variation among the various types of native grasses in the winter.  I feel this piece successfully expresses that - and furthermore - it is a fitting outlet for my angst as I transition from summer activities into winter studio time.  The development of this (winter in Montana) composition was somewhat unconscious - I had something very different in mind as I began working on this piece.  I am really happy with the way it has turned out!

Friday, November 23, 2012

Coloring the white

I spent some time experimenting with different ways of changing the color of the white areas in the deconstructed print along the border.    This picture shows a scrap of fabric I used for experimentation. I tried using watercolor pencils, watercolor crayons, fluid acrylics, and watercolor paint.  In the end I decided to paint directly on the quilt border with heavily diluted fluid acrylics.

Thursday, November 22, 2012

Screen Printing Organza

 Ok, so now I have decided to try adding some screen printed organza and cheesecloth to this piece, feeling that it might help with the composition.  I am printing a lot of this stuff - finding interesting effects when I layer several pieces for the printing - each layer turned out a bit more faint - which seemed good.
Here it is with a few pieces of the screen printed organza added.  Hmmmm.....I think the white resisted areas on the breakdown printed fabric are too glaring.  Gonna have to do something about that.