Cynthia St. Charles Store

Showing posts with label Rust Dyed Fabric. Show all posts

Friday, November 11, 2011

Rustic Neutrals Cropped and Closer


I thought you might appreciate a closer look, so here is a closer detail.


And here it is with cropping - closer to what it will look like when finished.
I am actually considering adding some screen printing - I've made some prints from the painted Indian robe I saw at the Lewis and Clark Interpretive Center. I am contemplating adding a battle scene across the center. Will mull that before doing anything drastic.

Friday, November 4, 2011

Fused Background

I have been thinking about this technique for quite a while. I have admired the work of artists who begin by creating a background of fabric pieces fused to the batting. I must admit it was fun cutting and laying out the fabric pieces to create this background.
I pulled hand dyed, hand painted, rust dyed and discharged pieces from my scrap drawer, cutting them to size and placing them on a large piece of Misty Fuse. Then, I covered the whole thing with a Teflon sheet and ironed away until everything was attached.
But now there are a lot of loose edges that will need to be sewed down. I think it would look smashing if they were hand sewn, but yuck, I don't want to do it - would take too long and would be tedious since this piece is so large - currently 24 x 45". I really don't want the hard edge of machine stitching though. I have decided I will do some block printing before doing any stitching. Once it has been stitched - the thread will interfere with the printing process, so I want to get that part done first. Not sure how the printing process will go with all those loose edges!
It does look much better cropped (above). I can imagine it will be much improved by block printing, as well. Stay tuned!

Thursday, October 6, 2011

Big Pile of Placemats

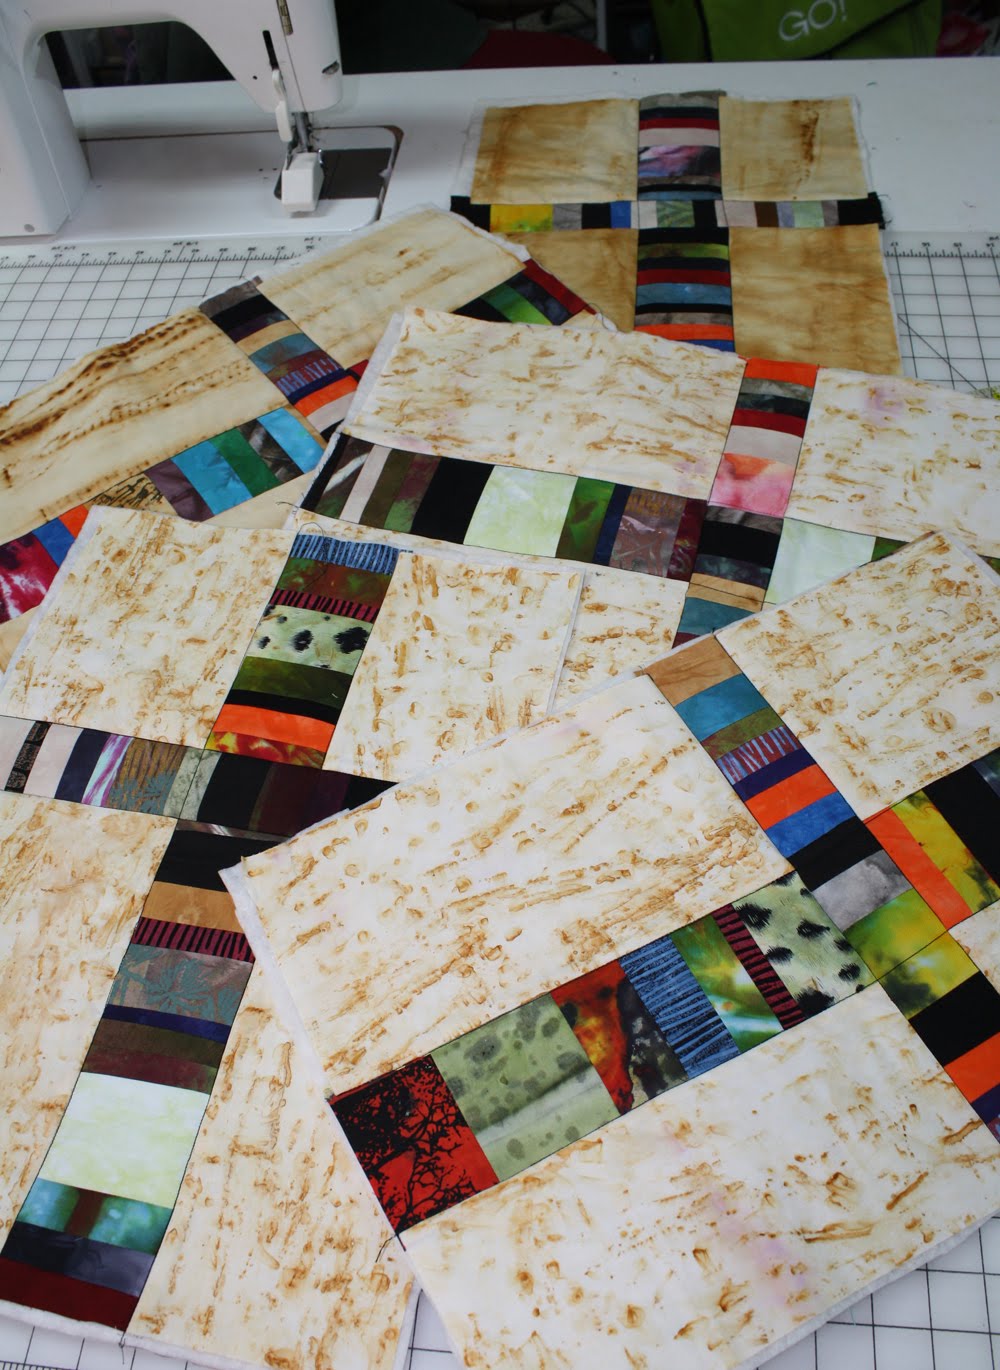
Here is the whole group of 12 placemats tossed out on the table. I am really quite pleased with the way they turned out. They measure 13 x 18".


Here are a few of the reverse sides. Also terrific, if I may say so myself!

Wednesday, October 5, 2011

Placemats Front and Back

I have finished binding all twelve placemats and two table runners (one is 30" long - for my kitchen table, the other is 56" long for my dining room table). Above is a picture of the reverse side of the placemat - I put discharged fabric on the back of everything. I have two sets of napkins that I use all the time and they coordinate beautifully with the new placemats. I have one set of rust dyed napkins (shown above) and another set of hand dyed napkins in a variety of multi-colors (shown below).
Next time I have a dinner party, I will try to remember to get a photo of the table setting!

Wednesday, September 28, 2011

Rust Dyed Placemats


I have been procrastinating about this project for quite a while, but it was really starting to bother me - not having a way to set a nice table that looks like it belongs in my lovely redecorated kitchen and dining room. Besides, the blue and yellow placemats I have been using for the past 15 years are starting to show wear on the binding (I am really amazed by the way they have lasted - they are washed at least once a week!)
I wanted to use up some of my scraps, and wanted to limit myself to using only scraps of fabric that I have dyed or painted or discharged. I wanted to use rust dyed fabric, because that is what I used to make the valance in the kitchen. I wanted to mix in some black because my new china is black. After sorting through the scrap bin, I discovered I did not really have a lot of small scraps of my own hand dyed, printed, discharged fabrics. I started sewing strips together, anyway, and then cut them down to a 3 1/2 inch width and kept sewing, making a long strip. This was pieced into the larger pieces of rust dyed fabric.


Here is the table runner (Above) before quilting.


The quilting was a bit of a dilemma. I knew I would have to use the walking foot and not free motion, because I always have a big problem with thread breakage doing free motion with rust dyed fabrics. I am usually pretty successful with the walking foot on rust dyed fabric, though, so that was the plan. I just opted for doing a variety of channel quilting styles. I knew I should keep it simple and as open as possible so that the texture of the rust dyed fabrics is not overwhelmed. I wanted to use black thread because my dishes are black. I didn't measure or mark for the quilting - just started stitching and I got some kind of wonky results. I don't mind this and by the time they are finished and the table is set, I am hoping they will look funky and contemporary.I have two more placemats and a table runner to finish the quilting on - then I will bind them with solid black - which will look striking with my black dishes, I think.

Thursday, June 9, 2011

Sky Over Pueblo in SAQA Structures in Cloth

I am delighted to announce that my quilt, "Sky Over Pueblo" is part of the Structures in Cloth exhibition sponsored by SAQA (Studio Art Quilt Association). The show opens today in the Arvada Center for the Arts and Humanities in Colorado. The show will hang through August 28, 2011.
I am so honored to have my work included in this wonderful venue!

Friday, April 15, 2011

Home Dec - My Pillows


I decided to go with 18" square pillows for my Family Room. The walls in that room were painted a dark sage green, so I painted and screen printed fabric to coordinate.
The valance in that room (has not been put back up, since we are still making a lot of sawdust in our home improvement projects) is made of rust dyed fabric, so I wanted to use rust dyed fabric on the pillows.

I chose some of the red hand dyed as an accent color. The sofas are a chocolate brown leather.

I really do not love these at this point and I am not sure why. I did not block print any of the fabrics, as I usually do for pillows - and I wonder if that is the problem.
I do realize they will be much improved by quilting and also by cropping. I think they may need a piping or binding on the edge.

I tried to think about what will look nice on the brown sofa - and I do think they will pop - and I also anticipate that they will come to life when they are in the room with the valance up, etc.

For now I am setting them aside until we get more home improvement stuff done. (at least to the point of hanging the valance)

Wednesday, March 9, 2011

Cropping Dilemma


I have been tidying up the studio.
I came across this piece - which I started years ago. Last winter I finished the quilting. Then - I set it aside because I could not decide whether to crop it or just finish it off at full size. There was a wonky side that was really kind of bothering me, but I wasn't sure it was serious enough to remove 1/4th of the quilt!

So, here it is at full size (above).
Below are a few detail images. At the very bottom of the post, you will see a cropped version.


Does the cropped version look better than the full image? (or should even more be removed from the right side of the pueblo?)
Seeing it on my blog like this helps me a lot. I am now inclined to just finish it off at full size without cropping, but I would be interested in your opinions.

Friday, February 4, 2011

SAQA Trunk Show


Studio Art Quilt Association (SAQA) has called for entries for their traveling trunk show.
They wanted small pieces that could be matted for display.
They were asking for a variety of techniques.
I thought about a length of rust dyed fabric that I had screen printed with petroglyph images.
I did a little quilting on it and finished the edges with a zig zag so it could be matted.

I got it sent off before the January 30 deadline.

Monday, December 6, 2010

Mail Art Project - Week Ten

Rusty Washers

This group of postcards is made of rust dyed fabric embellished with screen printed petroglyph imagery - (I think I took the picture in Arizona). I have added some rusty washers - stitched in place with pearl cotton.

I have two extras to mail to blog readers this week. They are going out to Sandra in Bismark, North Dakota and Sally in Sandy Bay, Tasmania, Australia. Email me your mailing address and full name, if you have not already done so and I will add you to the drawing for all future extra Mail Art!

Sunday, November 21, 2010

Iron Oxide Series


Iron Oxide # 6

Iron Oxide #5

Iron Oxide #3

Iron Oxide #2

Iron Oxide #1
These are more from the Iron Oxide Series done on my handmade paper combined with rust dyed fabric. These could not be included in the One Cause auction because they contain plant material that cannot be mailed overseas!

Saturday, November 20, 2010

One Hundred Collages - A Couple More


Iron Oxide # 4

Iron Oxide #7

Handmade paper, acrylic paint, rust dyed cotton, rusted washers, gel medium.
Mounted on watercolor paper.

Friday, May 7, 2010

Round Pillows


This group of round pillow covers are 12" diameter.
I used scraps of rust dyed fabrics, pieced together, then screen printed petroglyphs.
Then I quilted the fronts and created the pillow covers with an envelope back with Velcro closures. The binding is faux suede and the center embellishment is leather fringe with an antler button.

I am not able to find round pillow inserts here, so they will have to be ordered online. Not sure how they will look with inserts. Anyway, these were commissioned by my sister. Hope she likes them.

Saturday, March 20, 2010

Pueblo Resurfaced

Pueblo

Please excuse the stray threads. I didn't trim before I took the picture.
I am so happy that I have finally been able to complete the quilting on this piece! I'll post full image when I get it trimmed up and bound! The new Juki handled the pieced rust dyed fabric like a champ! I love the speed of this machine - finally something that can keep up with me!

Monday, March 30, 2009

Rust Dyed Art - SOLD!


Ancients


This 12 x 12" piece was juried into the SAA Squared Fiber Arts Exhibition at
Avenue 50 Studio in Los Angeles, CA.

I have just learned it sold!

Rust dyed cotton, screen printed with images from Painted Desert National Park in Arizona.
The background fabric is block printed hand dyed fabric.

I used printing blocks made from plumber's rubber gasket material - a technique I outlined in my article in the current Quilting Arts Magazine!