Cynthia St. Charles Store

Thursday, January 31, 2013

More Yellow?

I have been looking at this piece on my design wall for a couple of days and not lovin' it.  I was tidying up the studio and came across this piece of hand dyed silk organza.  It already has Mistyfuse on the back.  I pinned it up and realized that is what is missing!  More yellow!

Tuesday, January 29, 2013

Rangely Rock Art

 There is Rock Art scattered around the Rangely, Colorado area in at least a dozen locations.  Last spring, we drove through the area and spent a day driving around on dirt roads trying to find them.  We did pretty well!

 This one - called the Guardian is large.  It is located along the highway.  We parked across the highway and walked across to get a closer look.  It includes a very large Kokopeli (flute player).  Shown closer, below.  A cable has been anchored across the front of it because it is about to erode away - or rather it is about to fall off in a big chunk.  These sandstone bluffs erode easily - of course that's why they made such a good surface for the Rock Art.  These examples are pictographs because they are made with pigment rather than carving, and so they fade over time.

I just love rock art!  I will be sharing some of our discoveries over the next several Travel Log Tuesdays!

Monday, January 28, 2013
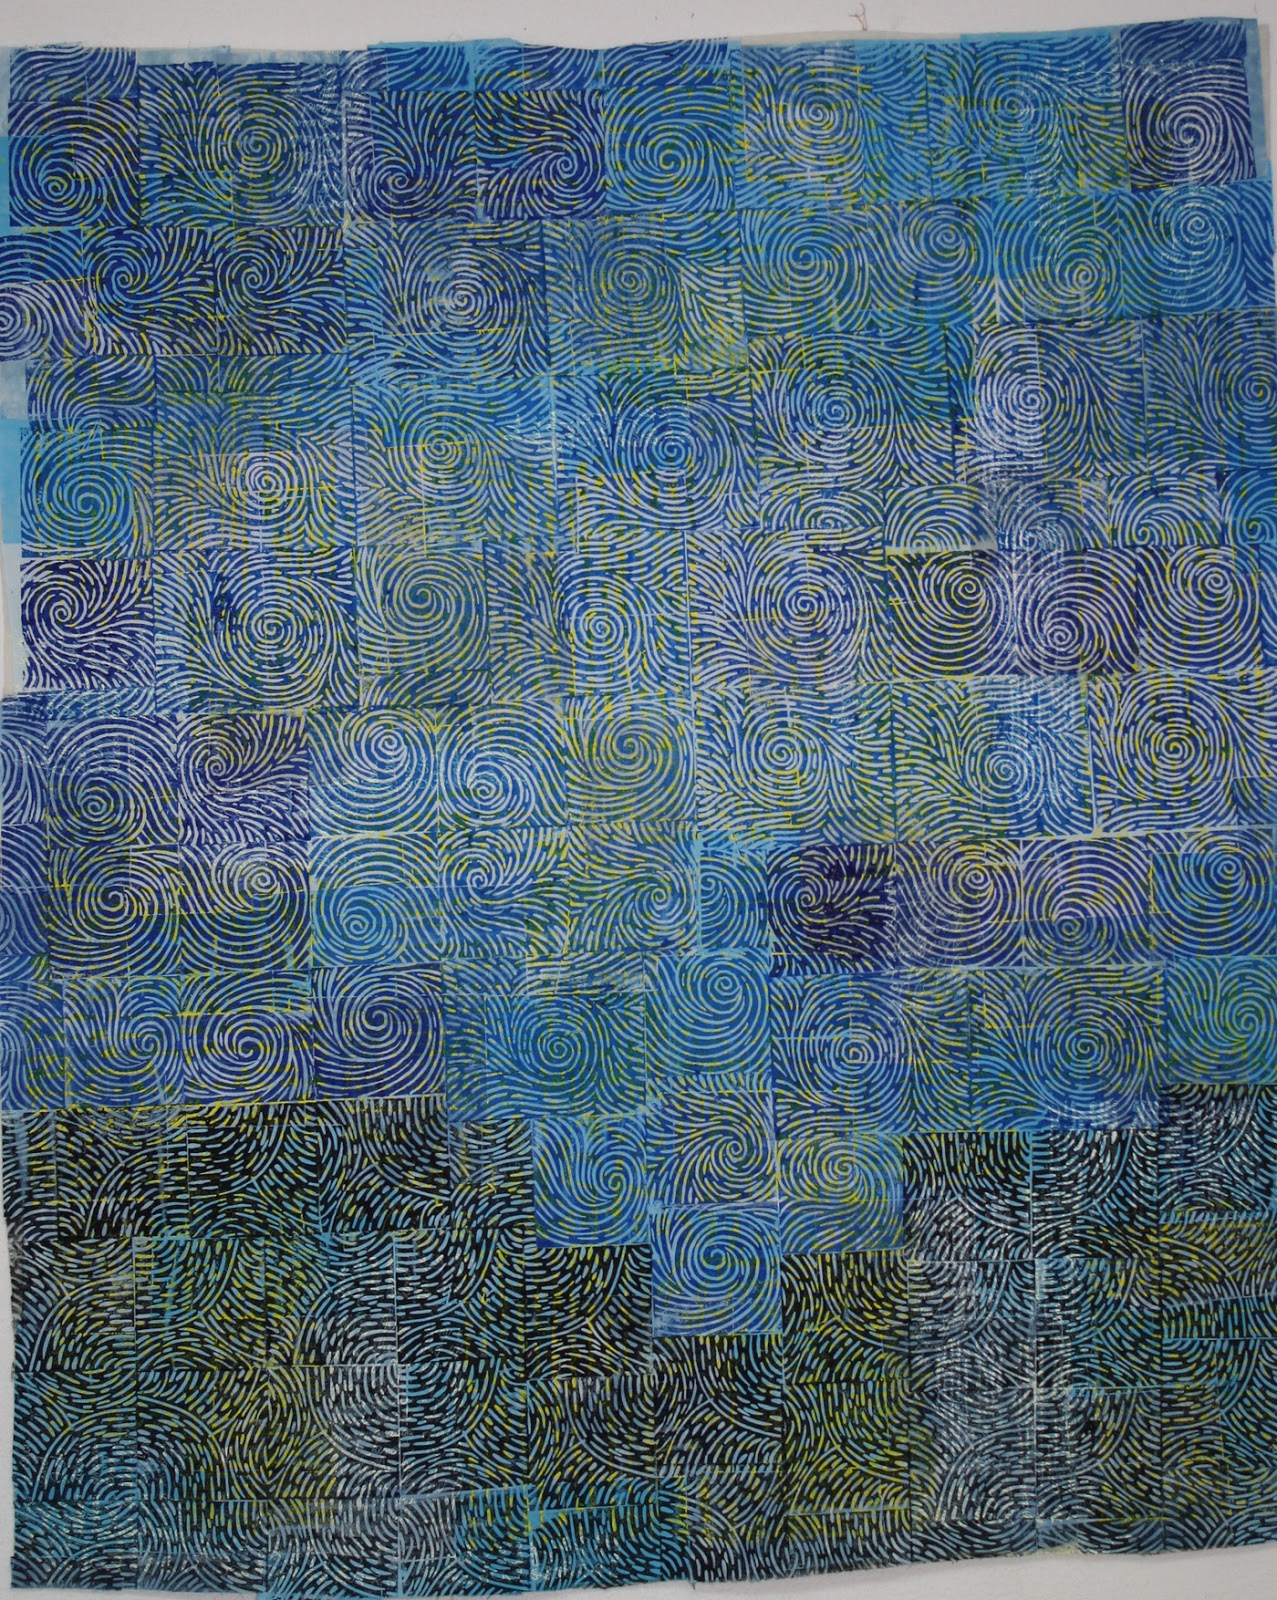
New Printing Blocks

  I wanted to make some new, larger printing blocks for this piece.  I am still thinking about Van Gogh's Starry Night as I carve these two blocks (actually two designs - one on each side of the same block).  It is about 5 x 7".

Roberta asked what I use for my block printing material.  I like Innovart Eco Printing Block material, which is available from Dick Blick.  Here is the link to the page for the printing block material I use.  It is affordable, 100% recycled, and holds up well to a lot of use.

I now have six different blocks with Starry Night swirls.  I think it is more interesting with the mix of sizes.
I have used two different colors of blue Setacolor Transparent paints for the printing;  Ultramarine Blue and Cobalt.  I like the way the yellow screen printing peeks through and kind of twinkles.
I want to use a different block and different color for the bottom third of this piece. 

Sunday, January 27, 2013

Screenprinted Yellow on Blue

 Here it is all screen printed.  The next step is block printing.  Stay tuned!

Saturday, January 26, 2013

Yellow Text on Blue

 I am using yellow screenprinting ink to print text across the surface of this collage.
The text Thermofax screens are adapted from writings of my grandmothers and some that I have written.
I use plastic disposable plates for my palette.  I reuse the plates over and over.  I have several so I can easily switch from one color to the next.  The paint dries and it does not reactivate when a new color is added to the palette.


Friday, January 25, 2013

Blue Collage

 Here is the blue collage all laid out on the Teflon table - this is before I used the iron to fuse the pieces in place.  Below - it is up on the design wall - everything is fused in place and I am pondering the orientation . . . that lighter area has me a bit perplexed - should it be towards the top or towards the bottom?

Thursday, January 24, 2013

Going to Blue

 The gray fabric is all gone, and I am craving some color, so I am going to ease into it with this group of blue hand dyed fabrics.
The first step is to add fusible web to the back of the fabrics.  I roll out my 20" wide roll of Mistyfuse on my Teflon covered work surface. I order my Mistyfuse rolls at .http://www.mistyfuse.com/

Wednesday, January 23, 2013

Winter Eve is finished!


 The finished size is 36 x 45".
It's always great to be able to finish another piece!

Tuesday, January 22, 2013

Colorado National Monument - Travel Log Tuesday

 When we drove through Colorado National Monument in May 2012, it was very blustery and the dust made all my pictures look hazy - so much dust in the air!


 Spectacular views though.

Monday, January 21, 2013

Machine Quilting the Binding

 It is a bit tedious to machine stitch along that 1/2" binding, but it really doesn't take very long. 
 I use the same thread on the binding that was used when quilting the quilt.  The variegated dark thread above is a Superior King Tut - Ebony is the color.  Below, is a YLI Trilobal Polyester - the color is called Stone.

Sunday, January 20, 2013

Printing the Binding

Here is a detail showing the binding that has been fused in place (above).
  Below is a detail showing the binding after it has been screen printed with text using Pearly White Screen printing ink.
 The next step is to block print on top of the screen printing.  Above, I have applied paint only to the edge of the printing block.  I am only printing the binding, which is about 1/2" wide.   Below, a well used (paint stained) printing block is face down on the binding - printing the edge.  My print table is covered in plastic - which is pretty much covered in paint (dry paint doesn't stain anything!)


 Here are three of images of the binding after it has been screen printed and block printed.

I have never been disappointed with this binding method!  It may seem like a lot of fussing, but - I don't have to do any hand stitching!

Saturday, January 19, 2013

Fused Gray Binding


 The binding fabric is leftover from the body of the quilt.  It already has Mistyfuse attached to the back and it has been cut to 1.25" strips.  I start with the corners, because that is the most difficult part.  I do a fused miter and try to match the fabric color.

 Here is a binding strip fused in place on the bottom of the quilt.  I am so glad I have just the right amount of fabric leftover from the quilt and it is a perfect match.
 It looks kind of wonky in this picture, but that is just the angle of the camera.  This is how it looks with the plain binding strips fused in place.  Next, I will print the binding to match the quilt.


Friday, January 18, 2013

Blocking the Gray

 Here is the full piece - quilted and it needs to be blocked before I trim and bind it.  I steam it and then pin it flat and square to the design wall.   A few more details below:

This piece doesn't have a title yet.  I am leaning towards - "Winter's Eve"  or something along those lines, though.  I should have the title picked out by the time I get the binding finished, and that's next!

Thursday, January 17, 2013

Wednesday, January 16, 2013

Quilting the Winter Trees

 After the background is completely quilted - I quilt the trees.  For this, I use two threads at once - a metallic silver from YLI and a white Aurifil in a 28 weight.  Using two threads like this gives it a good "pop" that I like for focusing on important details.